Tag Archives: Recipe

GRILLED POTATATOES

Grilled Potatoes

SPECIAL IMPLEMENTS

Barbeque

INGREDIENTS

¼ -cup water

1 – Pound potatoes

Olive oil

Salt

Pepper

Butter

DIRECTIONS

Wash and put potatoes in microwave safe bowl. Add ¼ cup of water. Cover with plastic wrap. Microwave on high for 6-minute intervals. Tetsing with a knife or fork until just tender. Carefully remove the bowl from microwave using oven mitts. Then remove plastic. Caution: the escaping steam burns! Remove excess water from bowl. Add 1 to 2 tablespoons of olive oil to bowl. Season with salt and pepper. Grill quickly over medium heat until slightly brown or grill makes appear.

NOTES: Serve with butter, salt and pepper.

Enjoy life, stay healthy, and have a great weekend!

The Drunken Chef (Russ)

Grilled Skirt Steak

Grilled Skirt Steak

SPECIAL IMPLEMENTS

Barbeque

INGREDIENTS

Skirt Steak

Marinade I (Teriyaki) or Marinade II (Rose & Bills)

DIRECTIONS

If your butcher has already pealed and cleaned the skirt steak for you then all you have to do is add it to the marinade of your choice. Let it marinate overnight. Turn the meat over every four hours except while sleeping. If they have not taken the time to remove the fat and silver skin off the meat, you will have to do it yourself. The silver skin will make it extremely chewy and unpleasant to eat.

After the meat has marinated. Preheat the grill. Add skirt steak onto the hot grill and cook on high with the lid open and grill for one minute. Turn down the grill to medium. Cook 1 more minute. Turn steaks 90 degrees. Cook one minute. Flip. Turn heat to high. Cook one minute. Turn down grill again. Turn meat 90 degrees. Turn grill to low and cook two more minutes or until your beer or meat is done. Thin skirt steak will be well done. Fatter pieces will be medium and pink. Let the steaks rest only long enough to serve with grilled potatoes and beer.

Enjoy life, stay healthy, and enjoy Septemeberfest!

The Drunken Chef (Russ)

The Friendship Bread Adventure

For all incentive purposes, it is essentially fall. In the fall people bake. So get your loaf pans ready. I am not a big baker, but I do bake.  I am a better chef then I am baker. To me, being a chef is the easier of the two. I have a lot of respect for other chefs and even more respect for bakers.

All this leads me to my story about friendship bread. For those of you who have never had it, it is addicting, not only to make, but also to eat! I received my first zip lock bag with friendship bread starter about twenty years ago. I have always talked about cooking with my fellow coworkers so it was only natural that one of them would ask if I was interested in baking a loaf of this stuff that I had never heard of. They may not have even asked me. They may have just thrust it upon me like a quest to find the Holy Grail or a Golden Fleece.

I accepted the challenge with the vigor of a young man (back then) and followed the directions as they were passed along to me. Then I proceeded to pass a bit of this goo called “starter” and the recipe to the next few unsuspecting coworkers while eating four loves of this stuff I made myself. It was indeed and amazing experience. However I did NOT save any starter when I when done and without the starter I could not make any more of these scrum-dilly-umtious loaves. It took several years before I saw this recipe come around again. By now, I had very much missed the cake like substance I had once had in the fall while drinking my coffee. This time I received the starter goo in a different building and I was a little older and a little wiser, but the recipe looked and tasted exactly the same. It was like the miracle of the friendship bread calling too me.

I learned my lesson from the first time of giving away all of the starter. I gave out the recipe and starters but always made sure to keep one batch of starter and copy of the recipe for myself. I kept making theses loaves of deliciousness every ten days and passing on the recipe to many, many, many more unsuspecting people as would take the stuff and make it. This included not only my sister, but all her coworkers as well! As I heard a group of people talking about this cake in the coffee room I thought; what have I done?! It was like and bad science fiction movie now that kept growing (like The Blob staring Steve Macqueen). Months of baking went by and just after Christmas Day I could eat no more Friendship Bread or I would spontaneously combust. Covering the walls in cinnamon. That or I would have to start buying stretchy pants. Mind you all this baking started BEFORE Thanksgiving. I finally decided to freeze my starter in the hope that in the fall it would still be good. Somehow I doubted freezing this starter would work.

In the New Year, I researched a few different recipes on Friendship Bread starter and found one that seemed like is would work best. I tested it out and gave more starters away for opinions the very next fall. My original frozen starter never came back to life, but the new recipe for a Friendship Bread starter (below) worked! It even freezes okay according to one of my coworkers.

It has been at least two years now since my last endeavor into this Friendship Bread baking frenzy, so now is a good time as any to start it again. It takes time for the started to get to be a good enough quality, taste wise, for me to giveaway so I discard my first extra batches myself and give away the stuff starting with the second batch. You guys can always let me know what you do in the comments section below.

Today, I am staring my first batch of “starter” to ultimately make two loves of Friendship Bread. I dare you to follow along with me these next few upcoming weeks leading up to Thanksgiving to see if it is a disaster or a delicious hit this year. I double dare you to join me in making said “starter” listed below and getting even more people involved in this wonderful tradition in your neck of the woods!

I am attaching the “starter” recipe below. Then in the next 10 days, I will provide you with the actual recipe to make the loaves of Friendship Bread itself. They call it friendship “bread” but it is really a cake. A yummy, cinnamony cake that is like heaven with coffee. Trust me! When it comes to coffee I do not #&%$ around. This is good shit. So lets go bake!   

The Drunken (blabbering) Chef (Russ)

You can follow me and this whole process on INSTAGRAM here:

Friendship Bread “Starter” Recipe

        Makes 4 to 5 starters

SPECIAL IMPLEMENTS

Plastic spoons

Glass Bowls

One box heavy duty Gallon Zip Lock type Bags

INGREDIENTS

1 package of active dry yeast

¼ cup of warm water (110 degrees F / 45 degrees C)

3 cups all-purpose flour (divided)

3 cups whole milk (divided and at room temperature)

3 cups granulated sugar (divided)

DIRECTIONS

(Do Not Use Any Metal mixing spoons, measuring spoon or bowls)

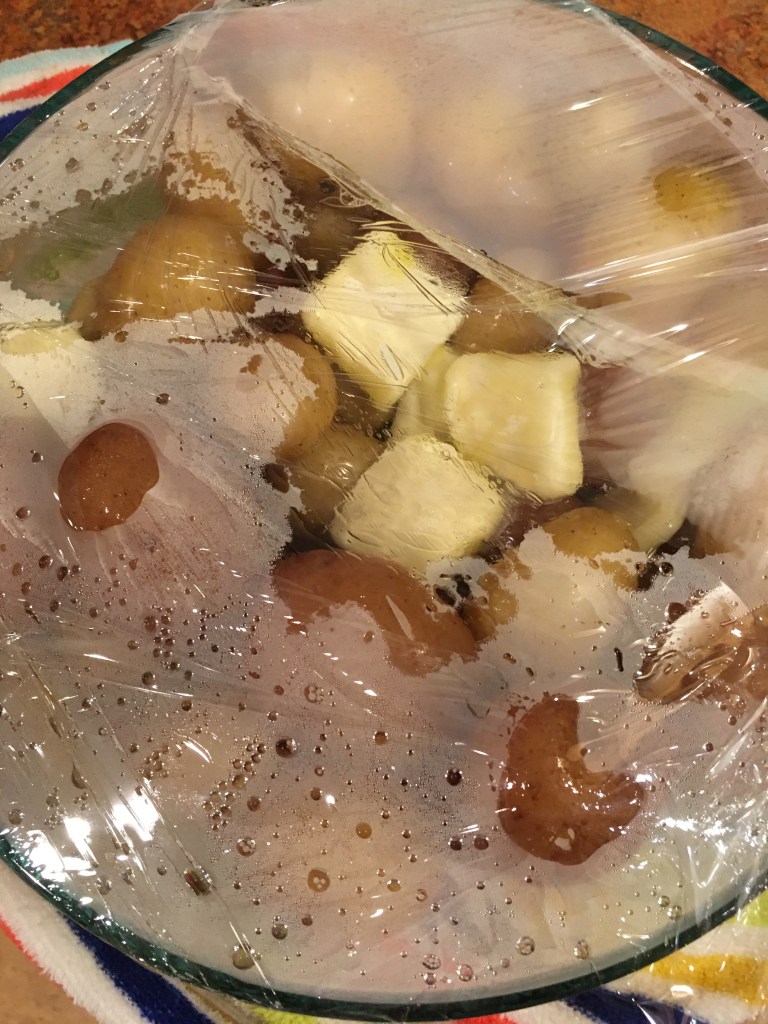
In a small bowl, dissolve yeast in the water. It is very important the water be the correct temperature. Use an instant read thermometer for this (see Gadgets article). Hot water will kill your yeast and cold water will take forever to bubble. Yeast is a live organism that omits carbon dioxide and that is why it bubbles. Let the yeast stand in the water for 10 minutes. In a large 2-quart glass, plastic or ceramic bowl, combined 1 cup AP flour, 1-cup sugar and mix well or it will all clump up when the water is added. Slowly stir in 1-cup milk and then the yeast mixture. Cover loosely and let stand until bubbly.

Consider this day 1 of a 10-day cycle. Leave loosely covered in a warm place in your kitchen until day 2. Just not on top of the radiator or stove! That’s a bit too warm.

On day 2, stir and transfer starter into a zip lock bag. On days 3, 4 and 5 squeeze the zip top bag several times or stir with a plastic or wooden spoon. Let some carbon dioxide escape from the bag when necessary. I have had one burst open because I forgot to let the air out and it was all over my counter and very messy.

Day 6; stir in 1-cup of AP flour, 1-cup granulated sugar and 1-cup of room temperature milk.

Days 7 thru 9; stir or squeeze the bag.

Day 10; stir in 1-cup AP four, 1-cup sugar, and 1-cup milk. Stir well. Remove 1-cup of batter to 4 to 5 zip lock bags.

NOW it’s DAY 1 again. You can give one cup (zip lock bag) to each of your friends along with a copy of the recipe found here: “Amish Friendship Bread”.

Begin the process all over again. I think by the second or third batch is when the batter is the tasting its best.  

NOTES: Serve with coffee and add chopped walnuts or cholate chips for an extra twist.

Enjoy life, stay healthy, and have a great weekend!

The Drunken Chef (Russ)

Hummus in the House

Last night I made some home made humus. Just because I needed a snack and just because I could. I had all the ingredients including the once hard to find Tahini.

Home Made Hummus

        Serves 4

SPECIAL IMPLEMENTS

Food Processor

Chef’s Knife

Cutting Board

INGREDIENTS

1 can chick peas

¼ cup Tahini

4 to 6 tablespoons olive oil

2 to 4 tablespoons water

1-tablespoon lemon juice

1 clove garlic peeled and chopped

1-teaspoon ground cumin

¼ tsp Onion powder

¼ tsp salt

Paprika

DIRECTIONS

Drain and rinse the chickpeas well. Add into you food processor. I have a small one that holds exactly one can of chickpeas. Larger food processors may require you to double this recipe.  Add the clove of chopped garlic, 4 tablespoons of olive oil, 2 tablespoons of water 1-tablespoon lemon juice,1-teaspoon ground cumin, pinch of onion powder, pinch of salt. Blend well on high. Slowly add 2 more tablespoons of olive oil while blending. Add 2 more tablespoons of water if the humus is not smooth enough.

Move to a glass bowl. Top with parsley, a sprinkle of paprika, and a drizzle of olive oil. Cover and refrigerate overnight.

NOTES: Serve with celery sticks, carrot sticks and pita bread.

Enjoy life, stay healthy, and have a great weekend!

The Drunken Chef (Russ)

Steak and Lobster Tails or Surf and Turf)

This has been a long and delightful weekend, for the most part. The down side is Jennifer is still in pain. We did have company come over on Saturday night.  I proceeded to make a repeat of the Valentines dinner I made back in February. At Jenifer’s suggestion, we purchased lobster tails to go with the steak I was already planning on preparing. After I cooked the tails, I was disappointed in their size at $30.00 a pound. They were tiny after they were cooked. Maybe two bites. Next time I will go somewhere other than Costco to buy them. In February, they was much bigger and a better deal. Live and learn.

The main meal was of course the steak. They were sirloin steaks and 2 inches thick. Because my mother in-law does not like seasoning on her steak I purchased her a separate small porterhouse steak. It was about an inch and a quarter to an inch and a half thick. The vegetable I served was creamed spinach. I cheated as it was not from scratch but frozen. The starch was small red and white potatoes. The plan was to microwave them for a bit and then throw them on the grill to finish cooking them and brown them a bit.

I started by washing and precooking the potatoes in the microwave. To accomplish this I placed the potatoes in a microwave safe glass bowl with a ½ inch of water at the bottom. I covered the bowl with plastic wrap so they wound steam and cut a ½ inch slit into the plastic so some of steam could escape. I microwaved them for about ten minutes, just until they got soft. I checked on them every 5 minutes to see how done they were. I then let them sit coved in the bowl while I barbequed the steaks. The potatoes would continue to soften in the still covered bowl.

I seasoned the sirloin steaks with onion powder, garlic powder, coarse salt and fresh cracked pepper. Then placed them on a hot grill. My mother in-laws likes her steak rare, so hers waited in the wings as it would cook faster then the ticker sirloin. I wanted ours to be medium rare and was a bit thicker so I started with the sirloin first. When it was ¾ of the way done I put on my mother in-laws. Mmmm yumm meat on the barbeque. I was so ready to eat. I ran into the house to get the potatoes. When I returned to the steaks the barbeque gas tank would run out of gas just as I opened the lid. No worries I thought. I have one more filled tank handy. I attached the second tank of gas and turned on the knob. Immediately I heard gas seeping out around the connector. I checked the connection and tried again. This time many curse words flew from my mouth. Thinking quickly I ran the potatoes back into the house and threw a cast-iron pan onto the stove and heated up. Lucky for me the sirloin steaks was almost done. I left them in the grill to keep warm and rest and threw my mother in-laws half-cooked steak into the now hot frying pan.

I switched gears now back to the potatoes. I put them back into the microwave but first added butter and seasoning before recovering them up. I microwave them only five more minutes so they were now done. Next, I began heating up the creamed spinach. I retrieved the sirloin from the grill and it was ready to slice having rested nicely in the less then warm grill. I plated my mother in-laws rare steak right from the pan to her plate. By the time the steaks all hit the table the spinach was ready and I served it right alongside the potatoes. The sirloin steak was served sliced and perfectly medium rare.

Scott of course bought two bottles of wine with them. The first bottle of wine was a white wine and he served that as I bought out the steamed lobster tails to the table. The white wine was a Chardonnay and was fabulous. I had made some drawn butter that I put in small bowls to go with the lobster tails. It was an excessive amount of butter for these tiny tails. The lobster was good tasting despite their small size and the wine was perfect. I guess size isn’t everything.

I called my mother in-law over to join us at the table when the steaks were served (she does not eat lobster). We all kept the extra butter from the tails in front of us and used it for the steak. That is when Scott opened the second bottle of wine. It was a red wine from Brian Arden, a Cabernet Franc from Napa Valley. I really need to go to California with them next year. It sounds like they have so much fun touring the wineries. The wine went perfectly with the steak. Even the potatoes turned out to be good but I was disappointed I could not grill them. They just look more appetizing with the little grill marks on them and it gives them a bigger depth of flavor. No matter, I will have to do it again. WHY? Because the lobber tails were not big enough sheeeesh….

I made a simple salad and had some terrific fresh tomatoes. There is nothing like a good steak and tomatoes. Except steak, tomatoes and red wine. The salad was just a bonus for the blue cheese dressing.

For dessert, we had cream filled lobster tails from one of my favorite local bakeries. There were leftover potatoes….hence why I had to do brunch…and make the home fries the next morning!

May the rest of your grilling season be a good one!

The Drunken Chef (Russ)

HASH BROWNS vs HOME FRIES

Welcome back to school dear readers. I have been more than extremely busy with all kinds of back to school activities at my real job plus losing my two editors Sam (whom I helped move back to Boston for college) and Juliana (also a second year college student).

Alas, I am left here to fend for myself in trying to correct my own spelling errors. Forget about me trying to correct my own grammar. That. Is. Just. Not. Happening. Have I mentioned my dislike for the English language? I’m sure as many of you are writers you are offended by this statement but I ask you, who the hell invents a language where one word sounds the same and then is spelled so many different ways as to change its meaning? Except the Eskimo’s of course who have over 200 ways to say the word “SNOW”. That makes sense! Sorry, tangent, reeling it back in.

Here I am reminiscing about the breakfast I made on Sunday. Yes I have been cooking. Sunday was Brunch Day at my house. This came about because Saturday was steak and lobster tails (Valentine’s day dinner repeated). We I made too many potatoes (seen here) for dinner so I said I guess I will just have to make home fries for breakfast. Then Jennifer said why don’t you all come over for breakfast? Soooo by the time I was done cooking breakfast turn into a small brunch. I know this is a long way to get here but here it is. So what the difference between hash browns and home fries?

Home fries are chucks of potatoes that are then fried. Whereas, hash browns are a grated potatoes that are fried. Home fires take much longer to prepare for because you need to cook the potatoes and let them cool FIRST before cutting them up and frying them. You could start with raw potatoes but it takes way too long to cook and then the morning is over and you’re starving and they are not as good as they are in the diner.

The diner is where I had my first home fries. I think. It could have been a coffee shop. The coffee shop is the place I remember the best. It was right next to a grocery store I used to work in. You could sit at the counter and watch the owner cook your meal. He was open for breakfast and lunch. It was there I learned the secret of cooking the potatoes first to make the hash browns.

This brings me to the potatoes I made from the night before. That is what Is use to make my last batch of hash browns. I have even used the ones I make on Saint Patrick’s Day or the baked potatoes from the night before on camping trips to make hash browns. I had a Cub Scout father that would wake up even earlier then me to start cooking breakfast. He is a great hash brown maker!

Hash browns are good too and you don’t have to plan ahead to make them. Just peel and grate some potatoes and your off and running. Mix in some flour and eggs and you have Latkes…Whoa. I had better slow down. The Irish in me is beginning to show with all this talk about potatoes. I do love hash browns served with eggs and bacon.

Home Fries

        Serves 8

SPECIAL IMPLEMENTS

Pan

Chef’s Knife

Cutting Board

INGREDIENTS

3 – 4 Potatoes

2 to 4 TBL Vegetable oil

Paprika, onion powder salt and pepper

Onion (diced)

Red or green peeper (optional)

DIRECTIONS

Boil/cook potatoes the night before and store in the refrigerator.

The next morning peel and cut up the potatoes into large bite size pieces. Season the potatoes with paprika, salt and pepper

Heat a pan and add 2 to 4 tablespoons of vegetable oil or olive oil to the pan. When hot add the potatoes. Cook on high until they just start to get brown. Add any diced onion or bell peppers now, if you like. Continue to cook until the outside of the potatoes just get a bit crispy but don’t burn them.

NOTES: Serve with eggs any style and maybe bacon. If you did make bacon. Save the bacon grease and cook the potatoes in that!

Enjoy life, stay healthy, and have a great weekend!

The Drunken Chef (Russ)

STUFFED Baked Potatoes (ala Barbecue)

Happy Thursday. Yesterday, I had hot dogs with my famous spicy onions. That’s a recipe that already here (just click the link above) but here is a new one.

This recipe can be done on the barbeque or in the oven. So it is versatile and yumerific!

Stuffed Baked Potato Recipe

        Serves 8

SPECIAL IMPLEMENTS

Microwave

Barbeque or Oven

Cutting Board

Vegetable brush

INGREDIENTS

8 extra-large Russet Potatoes

2 pounds Bacon

1 large head of broccoli

16 ounces sour cream

8 ounces butter

Fresh chives

Olive Oil

Coarse Salt

Cheese sauce (click here for recipe)

DIRECTIONS

I selected my russet potatoes at the local farm stand from the loose pile sold by the pound.  Scrub the potatoes with a vegetable brush under cold water. Coat the potatoes with olive oil and sprinkle on coarse ground salt (McCormick salt grinder). Pierce the potatoes in several places with a fork. I think this step helps to prevent the potatoes from “popping open” while they are cooking in the microwave. Place oil covered and forked potatoes in a microwave safe bowl. Cover bowl with plastic wrap. Poke a hole or two in the plastic to let some steam to escape. Microwave these suckers for five to fifteen minutes on high or until the potatoes just begins to give to the touch a little. Check the potatoes after each five-minute interval of cooking for doneness. My six pounds of potatoes took the full fifteen minutes.  Be careful both the bowl and the potatoes are hot! Remove from the microwave using oven mitts. CAREFULLY remove plastic wrap. This whole microwave step speeds up the cooking time of the potatoes so they cook faster. After the microwave, you can transfer the potatoes to a four hundred degree oven for thirty minutes or very hot barbeque. Be careful not to burn the potatoes on the grill. I turned the burners off that were directly under my potatoes and finished cooking them just as if they were being “baked” in an oven.

While the potatoes are “baking” it time to steam the broccoli. Wash the broccoli under cold water. Cut the stems away from the head of broccoli. Cut the head of the broccoli into bit size pieces. Place the broccoli florets into a microwave safe bowl. Add a ¼-cup of water to the bowl. Cover with a paper plate to keep steam in bowl or plastic wrap and cut slits in plastic to let some steam escape. When the potatoes are cooked, (thirty minutes have passed) begin cooking broccoli in the microwave high for six minutes.

Remove broccoli from the microwave using oven mitts. Carefully remove the plastic or take off the paper plate.

Carefully slice open each potato and place on a plate. Add one half tablespoon of butter to each half. Add the steaming hot broccoli then cover with shredded cheddar cheese. Add bacon, sour cream and chives to finish it.

Cheese sauce option: For true over indulgence, make a fancy ass cheese sauce, like the one shown on the potatoes above. Instead of grated cheese, cover the whole potato with cheese sauce at the end. Mmm. Yummy.

Serve this with your favorite wheat beer like Weihenstephan or a Blue Moon.

Enjoy life, stay healthy, and may everyone be kind to you.

The Drunken Chef (Russ)

INSTA-POT PULLED PORK (CARNITAS)

Below is the recipe for pulled pork from an Insta-pot that I promised a while back. I use it for tacos, burritos or even nachos.

Carnitas Recipe

Serves 8

SPECIAL IMPLEMENTS

Insta-Pot

Chef’s Knife

Cutting Board

INGREDIENTS

SOFT TACOS

8 flour tortillas

1 large tomatoes diced

16 ounces cheddar cheese shredded

1 head lettuce (shredded)

1 jar taco sauce or Cholula hot sauce or both

Pitted and sliced black olives (optional)

Guacamole or sour cream (optional)

PULLED PORK

2 Loins of Pork

1 small can of chili peppers (pictured below)

1 onion

3 cloves of garlic

1 container of low sodium beef broth

1 tsp onion powder

1 tsp Garlic powder

1 tsp Cumin

1 tsp Paprika

1 tsp Salt

1 tsp Black pepper

4 tablespoons Olive oil.

DIRECTIONS

PULLED PORK:

Cut the meat into large pieces. Season by sprinkling with onion powder, garlic powder, ground cumin, paprika, salt and black pepper. Let the seasoned meat marinate for a minimum of two hours in a zip-lock bag in the refrigerator.

In a 6-quart or larger Insta-Pot add just two tablespoons of olive oil. Turn on the insta-pot to Sauté and brown the meat in two or three batches. Return all the meat back into the pot. Add an onion that has been peeled and quartered to the pot. Add three cloves of whole garlic. Pour in enough beef broth to almost cover the meat.  

Cover and Cook for one hour on the “stew” setting. Move the meat without the cooking liquid to a bowl. It should fall apart easily. Use meat for tacos, burritos or nachos.

SOFT TACOS or BURRITOS:

Add cheese to a flour tortilla, add meat on top, and add guacamole and/or sour cream. Pour on the sauce of your choice (Cholula hot sauce or taco). Top with shredded lettuce and diced tomato. This also goes well with grilled red bell peppers and onion instead of the lettuce and tomato. 

NACHOS

Fill a platter with chips. Add grated cheddar cheese on top and melt in oven or microwave. Top with meat, guacamole, sour cream, sliced black olives; or add hot refried beans and jalapeno peppers for an additional extraordinary culinary experience.

This can be paired with a nice old vine red zinfandel or an Icey Cold Modelo Beer.

Enjoy life, stay healthy, and may everyone be kind to you. 

The Drunken Chef (Russ)

INSTA-POT Spagetti Suace

Good Morning. Last night was chicken cutlet parmesan and spaghetti night at Sam’s request. I was going to make it on Sunday, since this is usually a very time-consuming recipe making it the way my mother did it for years. Unfortunately, I got home later than expected, just after 5:30pm, so I knew I couldn’t keep everyone waiting too long for dinner.

I told my mother in-law, and wife, dinner would not be ready for two hours. “Why?” Jennifer asked. I answered: “I am making chicken cutlet parmesan tonight.” I answered. To which my wife replied, “OH! Sam must be there influencing you.”

Anyway, I decided to speed things up and make the sauce in the Insta-pot. Besides, this gave me the perfect opportunity to write-up the recipe on how to make sauce in an Insta-pot.  My coworker is thinking of getting one of these pressure cooker appliances for this very reason. She was a big fan of my pulled pork and brisket recipe from this very Insta-pot.

So here is the recipe:

Insta-pot Spaghetti Sauce

1 # 10 size can of plum tomatoes or 3 of those really large 32 once imported plum tomatoes

1 Large or two medium size onion

4 to 6 cloves garlic

2 teaspoons Parsley flakes or tablespoon fresh

1/4 tsp Oregano

1/2 tsp Basil

1/2 tsp Crushed red pepper

1 tsp Salt

1/2 tsp black pepper

DIRECTIONS

Fill the blender half way with plum tomatoes or one 32 ounce can. Using the pulse button and blender set to chop (lowest setting), pulse bleeder until the tomatoes are well chopped. Pour chopped tomatoes slowly into the Insta-pot and turn it on to the sauté setting. Repeat this three times (leaving the Insta-pot on of course). Stir the sauce after each addition. Roughly chop the onion and garlic. Add the roughly chopped onion and garlic to the blender with a 3/4 cup of water. Pulse until well chopped (Almost smooth). Pour the fragrant smelling onions and garlic into the sauce. Stir, stir stir. To get out the remaining onion, use an addition 1/4 cup water in the blender, swish it around, and pour it into the Intsa-pot and stir well. Add seasonings – parsley, oregano, basil, crushed red pepper salt and black pepper. Stir, stir stir. Keep stirring occasionally to keep the sauce from burning and until it starts simmering (bubbling up to the top).

Put on the cover and set to pressure cook on low pressure for 20 minutes. THAT’S IT DONE. Carefully release the pressure and serve.

That’s how to make homemade spaghetti sauce in an hour. If you want to add meat balls omit one can of tomatoes and cut back on the spices a bit.

This is what I used to make the chicken parmesan and then put it on our spaghetti. I thought it was good. Sam and my mother in-law both loved it!

I served mine with an ice cold Peroni beer along with some fresh grated parmesan cheese. I also made garlic bread for everyone. I had no time for a vegetable or salad, sorry. Bad Husband.

Until next time when I might be bring you a stuffed baked potato recipe, we’ll see. Be well, be happy and enjoy life.

The Drunken Chef (Russ)

OYSTERS ROCKEFELLER RECIPE

Below is the recipe I promised for Oysters Rockefeller for the oven not the grill.

Oysters Rockefeller

SPECIAL IMPLEMENTS

Oyster Knife (not to be confused with the clam knife)

Kitchen towel

Chef’s Knife

Cutting Board

1 box of kosher salt

INGREDIENTS

2 dozen oysters

1 Onion minced

I stick butter

The juice of a fresh lemon (approximately 3 tablespoons)

Fresh spinach

1 tablespoon Lemon Juice

Black pepper

½ cup Flavored Bread crumbs

Olive oil.

2 lemons cut into wedges (8 wedges)

Serves 4

DIRECTIONS

In a large skillet, sauté onion in butter until tender. Add spinach; cook and stir until wilted. Remove from the heat; stir in cheese, lemon juice and pepper

Mix together olive oil and breadcrumbs.

Spread kosher salt into two one inch deep baking pans.

Shuck oysters, reserving oyster and its liquid in the bottom of the shell. Lightly press the shells down into the salt while keeping the oysters in their shells, thus using salt to keep oysters level. Top each oyster with 2 teaspoons of the spinach mixture.

Now sprinkle on 2 teaspoons of the bread crumb mixture.

Bake, uncovered, at 450° until oysters are plump, and the breadcrumbs begin to brown 6-8 minutes. Serve immediately with lemon wedges.

Enjoy life, stay healthy, and may everyone be kind to you.

The Drunken Chef (Russ)

© Russ Ahrens and The Magic of a Perfect Pairing,2021